(Sales – Sales Setup – SO Types)
When you create a sales order, it is assigned to an SO Type. SO Types can be used to categorize different types of orders and to give each order type its own form layouts and other settings.

Screen Details
List Tab
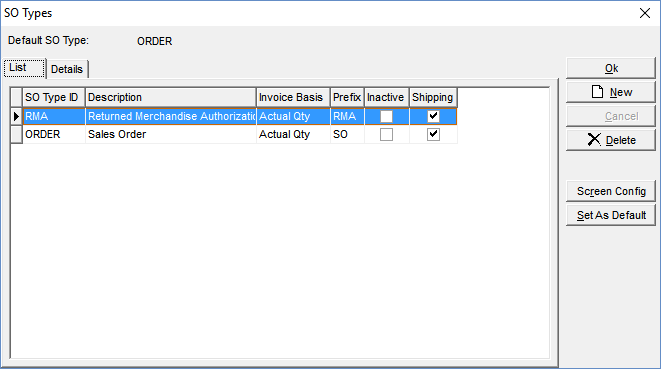
Your existing SO Types and their primary settings are listed on this screen.
New Button
Click this button to create a new SO Type. Clicking the button takes you to the Details tab, which is cleared and ready for new entries.
Set as Default
This button is used to designate the SO Type that gets selected by default each time a new sales order is created. Highlight the desired SO Type, then click this button. You will see the Default SO Type displayed in the upper panel.
Details Tab

General Info
SO Type ID
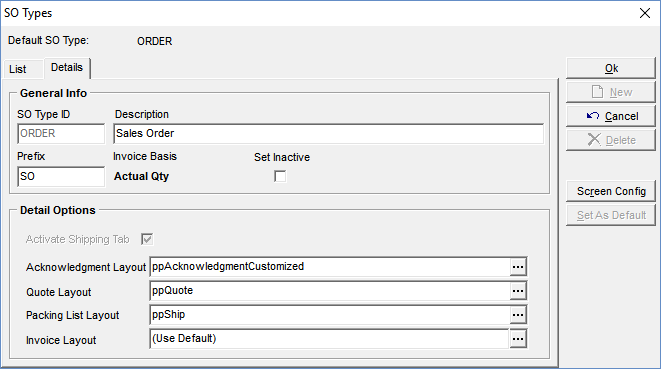
Enter an up to 8-character code that identifies this SO Type on lists and lookups.
Description
Enter an up to 50-character Description that accompanies the SO Type ID on screens and lookups.
Prefix
Enter an up to 4-character Prefix that precedes the numeric portion of the sales order number. An alpha prefix makes it easy to recognize the type when looking at a sales order number.
Non-Active
If you no longer wish to use this SO Type, select this checkbox. It will no longer be available for selection when creating new sales orders.
Detail Options
Activate Shipping Tab
Clear this checkbox if you don’t intend to create shipments with this SO Type. If you use this type for walk-in “counter sales”, you don’t need to create packing lists and enter shipping charges, in which case the sales order Shipping tab does not need to be activated.
Acknowledgment Layout
Quote Layout
Packing List Layout
Invoice Layout
Leave these field blank if you want to use the default layout for each of these forms. If you create a custom layout for this SO Type, use the lookup to select your custom RTM layout. See chapter 3 for more details on forms editing.
Screen Config Button
This button provides access to the Screen Config window, within which you can activate and deactivate various fields on sales orders assigned to this SO Type.
NOTE: You must have Administrator level user security to be permitted to access this screen.
SO Header
The following optional set of fields is not selected by default, but may be selected if you wish.
Service Only
If you use the Service Assets screen, which is a legacy application that is no longer furnished with the standard product, select this option to activate the Service ID field in the sales order header screen.
Costs & Profit
If you select this checkbox, the Est Costs, Margin %, and Profit fields display in the sales order Header screen. For most companies this information is not relevant to order entry and we recommend that you leave this checkbox cleared.
SO Lines
The following field options are not selected by default, but may be selected if you wish.
Est Cost
This is the item’s unit Estimated Cost at the time the sales order line was created. For most companies this information is not relevant to order entry and we recommend that you leave this checkbox cleared.
Act Cost
This is the actual unit cost of the quantity picked to-date. For most companies this information is not relevant to order entry and we recommend that you leave this checkbox cleared.
Margin or Markup
This is the Margin or Markup (depending on your Profitability setting in the Sales Defaults screen) of the net Price over Est Cost. For most companies this information is not relevant to order entry and we recommend that you leave this checkbox cleared.
Total Cost
This field displays the total estimated cost, which is the line’s Qty multiplied by the Est Cost. For most companies this information is not relevant to order entry and we recommend that you leave this checkbox cleared.
Warranty Code
If you provide warranties with your items, select this checkbox to make the Warranty Code field visible.
NOTE: You only need to make this field visible if you have occasional need to change the Warranty Code.
