
(Utilities – Forms Edit Menu)
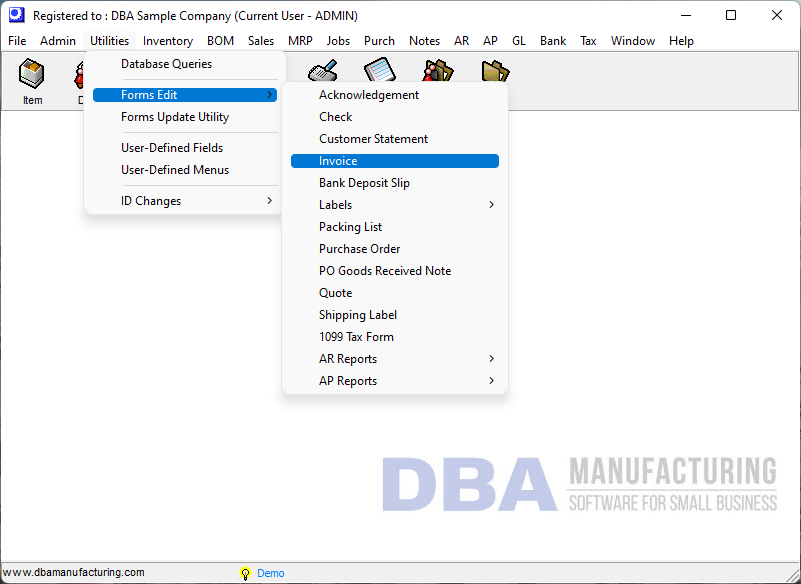
DBA uses the following forms and labels, which are listed on the Forms Edit menu as follows:
Main Menu
| • | Acknowledgment |
| • | Check |
| • | Customer Statement |
| • | Invoice |
| • | Line Item Label |
| • | Packing List |
| • | Purchase Order |
| • | Quote |
| • | Shipping Label |
| • | 1099 Tax Form |
Labels
| • | Item |
| • | Job Receipts |
| • | PO Receipts |
| • | Templates |
Links:

Editable Layouts (RTM’s)
Forms layouts are stored in an *.rtm file format (which we refer to as RTM layouts) that can be edited. You can add logos, bar codes, fields, or you can change fonts, layouts, and graphics. See further below for instructions on doing so.
You must rename your customized forms
It is imperative that you save your customized forms with a different name than your default layout name. During program updates, the default forms are always replaced. If you do not have unique names for your customized forms, your changes will be lost.
Default RTM Layout Names
The following are the standard RTM layouts supplied with the system.
Acknowledgment
ppAcknowledgment.rtm
Check (Legacy Financials)
ch-Stub-Stub-Check.rtm
ch-Check-Stub-Stub.rtm
ch-Check-Stub.rtm
ch-Stub-Check.rtm
ch-Stub-Check-Stub
Customer Statement (Legacy Financials)
ppCustStatement.rtm
Invoice
ppInvoice.rtm
Item Label
ppReportLabels.rtm
Line Item Label
lblShiplines.rtm
Packing List
ppShip.rtm
PO Goods Received Note
ppPOReceivedNotes.rtm
Purchase Order
pOrder.rtm
Quote
ppQuote.rtm
Shipping Label
lblShipment.rtm
1099 Tax Form (Legacy Financials)
pp1099.rtm
Form Editing Instructions (Utilities > Forms Edit)

Choose the Form to Edit (Utilities > Forms Edit)
Launch the appropriate form for editing from the Utilities > Forms Edit menu. If this is a new customization, modify the default form and rename the file (using File > Save As).
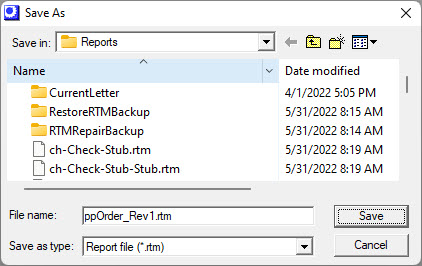
Customized forms must always be renamed
Always save changes to the default form with a different name (using File - Save As). It is often helpful to use the default form name as the base file name and append a description to it. For example, a modified Purchase Order could be ppOrder_Rev1.rtm. This would help you more easily identify all of your customized invoice forms if you have more than one modified forms to choose from.
Navigating to different layouts for the same form
Some forms have multiple RTM layouts, such as invoices, packing lists, and purchase orders. When you access the form through the Utilities > Forms Edit menu, the system will display the first RTM format it finds. To navigate to the particular format you wish to edit, click File – Open and navigate to the appropriate RTM file.
Customizing invoices - special instructions
WARNING: In order to edit an invoice RTM layout, you must first create at least one actual invoice and you must be on the List tab of the Sales Orders screen with the highlight bar on the sales order associated with the invoice.
NOTE: Create this sales order and invoice in the sample company instead of on live data. The sample company and main company share the same form layouts.
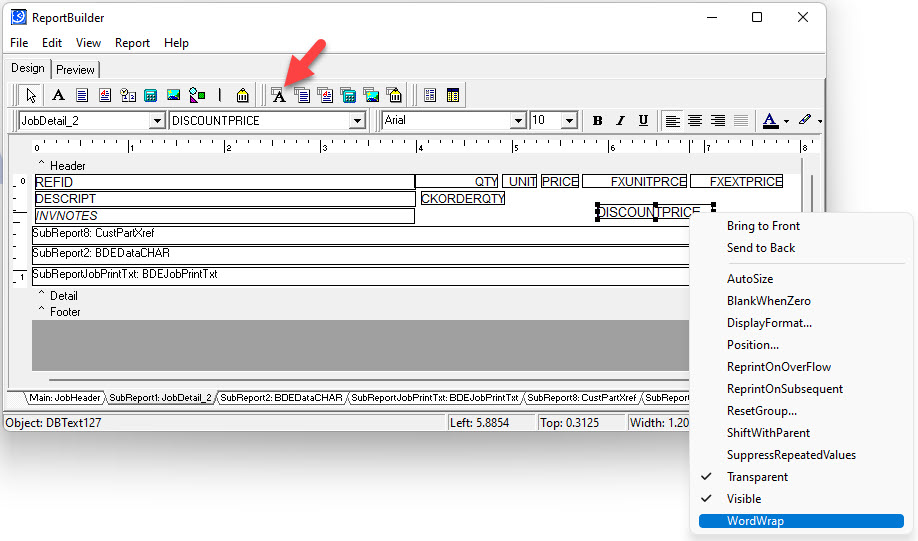
Adding fields to forms
| • | Open the form. |
| • | Pay attention to the warning message. Do not delete any fields already on the form. |
| • | Create a DBText box in which to add the field (the DBText box can be created by clicking the button 8th from the right, with the capital A and the white piece of paper on it at the top of the form). |
| • | Place the DBText box wherever you wish on the form. |
| • | There will be two dropdown boxes that appear at the top toolbar of the form after you place the DBText box. |
| • | Choose the Table or ‘Data Pipeline’ that contains the field from the dropdown menu in the left box. |
| • | Choose Field from the menu on the right |
| • | A list of table and field definitions is available for reference in the File – Data Dictionary. |
•Right click on data field for additional formatting tools
| • | Use File – Save As to save your form changes to a file name different than the default form. |
| • | Then after saving it, click File – Close. |
Adding bar code fields to forms
| • | Open the form. |
| • | On the toolbar at the top of the screen, click the Bar Code icon (10th from the left) for non-database fields. Use the DB Bar Code icon (17th from the left) for system database fields. Then, in the desired location within the report, click the mouse to create the bar code field. |
| • | Once a DB Bar Code field has been created, you can associate database fields by clicking the field with your mouse, then selecting VIEW/TOOLBARS/DATA TREES and associate the desired data field with the bar code. |
| • | If you need to change the format of the bar code field, right click on the field, click CONFIGURE and edit the TYPE from the drop down listing. |
| • | Use File – Save As to save your form changes to a file name different than the default form. |
Adding your logo to forms
| • | Open the form. |
| • | On the top toolbar, click the Image icon (seventh icon from the left). |
| • | Click your mouse into the body of the document. An Image box should now appear. |
| • | Drag the Image box to the desired location in the form and resize it as needed. |
| • | Right click inside the Image box and select Picture from the listing. |
| • | Browse the path to where your image is stored and click OK to load the image. Please be aware that not all image formats are supported. |
| • | Use File – Save As to save your form changes to a file name different than the default form. |
Customized Forms Designations
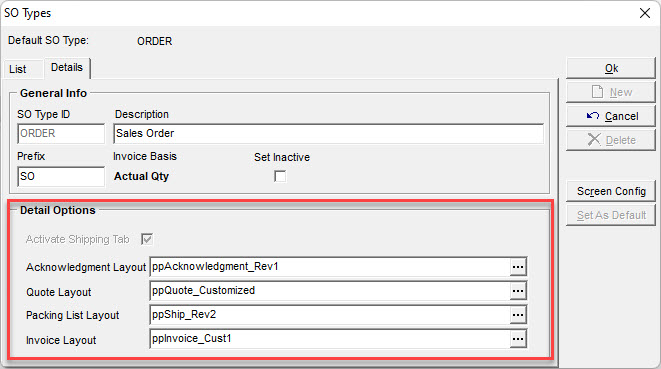
The following forms allow for default designations, meaning that the particular RTM layout used can be designated at the order type, customer, and supplier level. This enables you to create custom layouts for particular situations, such as when a customer requires special wording. If you want to use the system forms without any modifications, you can leave the default designation fields blank.
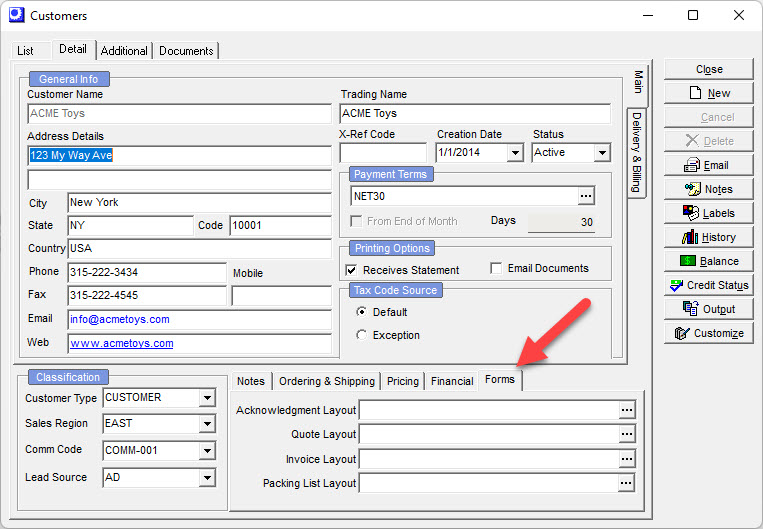
Sales Forms - Quote, Acknowledgment, Packing List, and Invoice
SO Type (Sales – Sales Setup – SO Types - Details Tab)
Customer (Sales – Customers – Detail Tab – Forms Sub-Tab). This default setting overrides that of the SO Type.
Form designation against an SO Type
Form designation against a specific Customer
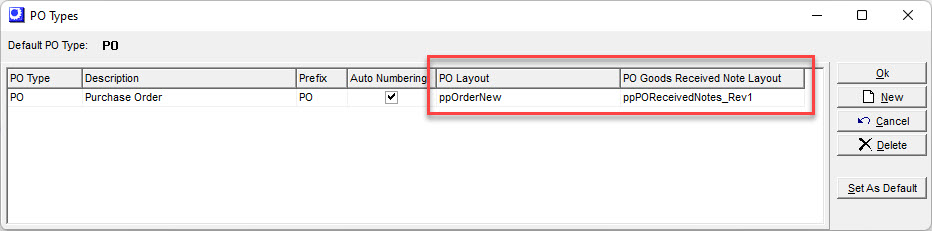
Purchase Order
PO Type (Purch – Purchasing Setup – PO Types)
Supplier (Purch – Suppliers – Detail Tab – Forms Sub-Tab). This default setting overrides that of the PO Type.
PO Goods Received Note
PO Type (Purch - Purchasing Setup - PO Types)
Form designation against a PO Type
Check (Legacy Financials)
Bank Account (Bank – Banking Setup – Bank Accounts)
Customer Statement (Legacy Financials)
Customer Statement (AR - Customer Statements)
1099 Tax Form )Legacy Financials)
Tax Form (AP - Reports - 1099 Tax Form)
Labels
(Utilities – Forms Edit – Labels)
Use the screens on the Labels sub-menu to create customized labels. Labels are stored in the system database and do not have system RTM files.
Training Course
Support Center – Videos–Setup – Item Labels Setup
Label Types
Three types of labels are available:
Stock Item Labels
These are general item labels for item identification or packaging purposes that are printed from the Stock Item Labels screen as needed. You can also print thee labels via the Labels button on the Stock Items and Stock Adjustments screens. Stock item labels are used for these purposes:
| • | Relabeling existing stock |
| • | Shipping labels |
Job Receipt Labels
These are item labels that are printed directly from transactions in the Job Receipts screen as part of your job processing workflow. Job receipt labels are used for these purposes:
| • | Manufactured item product packaging |
| • | Manufactured item warehouse identification, including tracking characteristics such as lot and serial numbers |
| • | CTO (custom to order) item labeling with linked job and sales order information |
PO Receipt Labels
These are item labels that are printed directly from transactions in the PO Receipts screen as part of your PO processing workflow. PO receipt labels are used for these purposes:
| • | Purchased resale item product packaging |
| • | Purchased item warehouse identification, including tracking characteristics such as lot and serial numbers, or linked PO information |
Label Templates
“Label templates” are used to provide standard page size specifications for your labels. When you create a customized label, you can originate it from a template so that the page size fits the desired label size and destination printer.
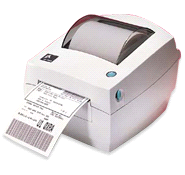
Label Printing
The standard labels supplied with the system are designed to print on a continuous roll label printer with 4 inch wide labels (see example picture below). The default label sizes are 4 x 2 and 4 x 4. Our design and testing has been done on Zebra continuous roll label printers, but you can use any continuous roll printer.
Label Customization
(Utilities – Forms Edit – Labels – Stock Item Label)
(Utilities – Forms Edit – Labels – Job Receipt Label)
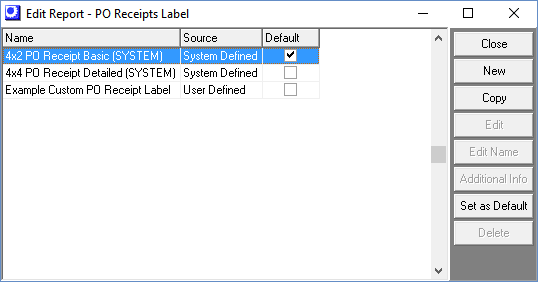
(Utilities – Forms Edit – Labels – PO Receipt Label)
Each of the three label editing screens – Stock Item Label, Job Receipt Label, and PO Receipt Label – work the same way as described in this section.
Screen Details
Screen Details
Grid Fields
You can create multiple label formats within each label type, all of which are listed in this grid.
Name
This is the name that identifies each label format for selection at time of label printing.
Source
| • | If the label source is ‘System Defined’, it means that this is a standard label format supplied with the system, which cannot be edited. |
| • | If the label source is ‘User Defined’, it means the label format was created by you and can be edited for custom requirements. |
Default
Using the Set as Default button, you can select one label format in the list to be the default version at time of printing.
Buttons
New
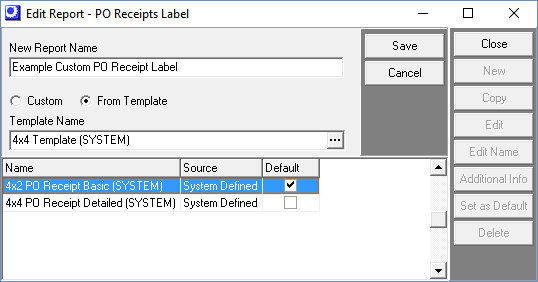
Click this button to create a new label format. You are presented with this screen:
Screen Details
New Report Name
Give your label format a name in this field.
Custom, From Template
| • | Select the Custom option if you wish to establish the page setup specifications for this label format from scratch. |
| • | Select the From Template option if you wish to select a “label template” that has already been given page setup specifications. Select a template from the lookup in the Template Name field. |
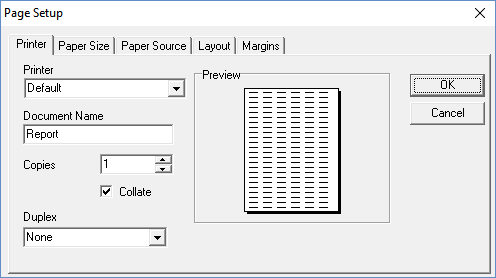
Save Button
Click this button to save your new label format. If you had selected the Custom option, you are presented with this screen, which enables you to establish your page size specifications:
Copy
Click this button to copy the selected label format to a new label format. A New Report Name field becomes visible at the top of the grid. Enter your new label v format name, then click the Save button. All the layout and page size specifications from the selected label format are copied over to the new label format.
Edit
Click this button to launch the forms edit screen, shown below. On this screen you can perform all the standard editing functions, including adding fields from the data pipeline, adding barcodes, and customizing field labels and fonts.
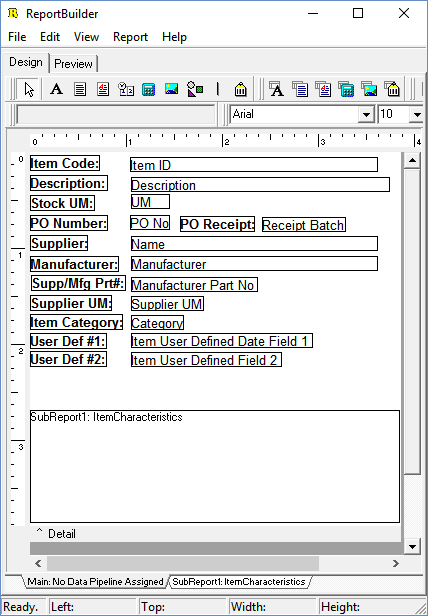
NOTE: We suggest you study the data pipelines, which have been populated from many related tables so that virtually any relevant data associated with items, jobs, linked sales orders, and purchase orders can be brought into your labels.
NOTE2: You cannot edit a label format with a ‘system defined’ source, which is a standard label format supplied with the system. Use the Copy feature to copy a system defined label format to a new label format if you wish to edit its layout.
Tracking Characteristics
Be aware that ‘system defined’ item labels are set up to automatically print tracking characteristic values (such as lot and serial numbers) as a sub-report to the main layout. Characteristic descriptions and values print in a vertical “stack” format underneath the main layout.
Edit Name
Click this button to change the name of one of your ‘user defined’ label formats. A New Report Name field becomes visible at the top of the grid. Enter the new label format name, then click the Save button.
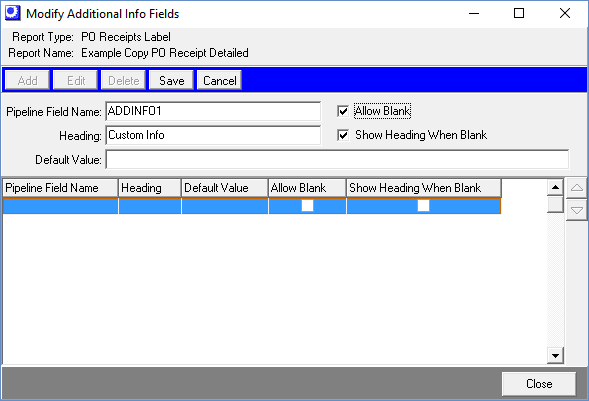
Additional Info
Click this button to create a customized text field that gets added to the data pipeline so that it can be included on this label format. At time of printing, the user will be prompted to enter a text value that then gets printed on the label. You are presented with this screen:
Screen Details
You can create any number of pipeline fields for use with this label format.
Buttons
Add
Click this button to add a new pipeline field. The fields in the upper panel become active for data entry.
Edit
Click this button to edit the selected pipeline field. Its fields get inserted into the upper panel for editing. .
Delete
Click this button to delete the selected pipeline field in the grid below.
Save
Click this button to save your entries in the upper panel to the grid below.
Upper Panel
Pipeline Field Name
This is the field name that gets listed in the data pipeline when you add fields to your form layout. The program provides a sequential default value of ‘ADDINFO1’, ‘ADDINFO2’, etc., but you can type in your own field name, if you wish.
NOTE: To find this field in the data pipeline, select the ‘Additional Info’ data set. Within that data set, the field name is the name entered in this field followed by ‘_VAL’ such as this example:
ADDINFO1_VAL
Allow Blank
If at time of printing you want the text entry into this field to be optional, select this checkbox. If you want text entry to be mandatory, clear this checkbox.
Heading
This is an optional field label that can accompany the text that gets entered by the user. For example, if you want the user to enter the current room temperature in the text entry field, you could have a heading of ‘Temp:’ precede the text entered by the user.
NOTE1: To find this field in the data pipeline, select the ‘Additional Info’ data set. Within that data set, select the data pipeline field name entered above followed by ‘_HDR’ such as this example:
ADDINFO1_HDR
NOTE2: You can leave this field blank and use a standard field label on your form layout as an alternative. If, however, you wish to use the Show Heading When Blank feature (see next), you should enter a Header and use it as the field label.
Show Heading When Blank
If you always want the heading to be printed on the label, even if the user does not enter a text value, select this checkbox. If you only want the heading to print when it is accompanied by a text value entered by the user, clear this checkbox.
Default Value
This is an optional field that inserts a default text value into this field at time of printing. The user can accept the default value of over-type it with a different text value.
Set as Default
Click this button to make the selected label format the default label format at time of printing.
Label Templates
(Utilities – Forms Edit – Labels – Label Templates)
“Label templates” are used to store sets of standard page setup specifications that can be used to originate user defined label formats.
The system is supplied with two ‘system defined’ label templates (4 x 2 and 4 x 4), both of which are formatted for 4 inch wide continuous roll label printers.
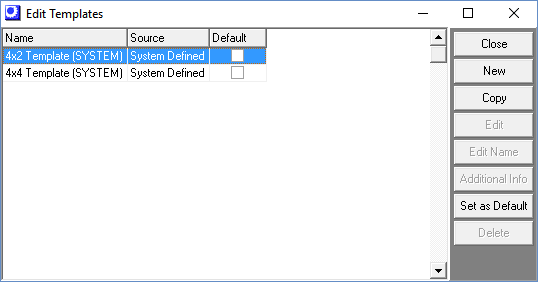
Screen Details
Grid Fields
Name
This is the name that identifies each label template.
Source
| • | If the template source is ‘System Defined’, it means that this is a standard template supplied with the system, which cannot be edited. |
| • | If the template source is ‘User Defined’, it means the template was created by you and can be edited for custom requirements. |
Default
You can select one template in the list to be the default template at time of template selection when originating new label formats.
Buttons
New
Click this button to create a new template. You are presented with this screen:
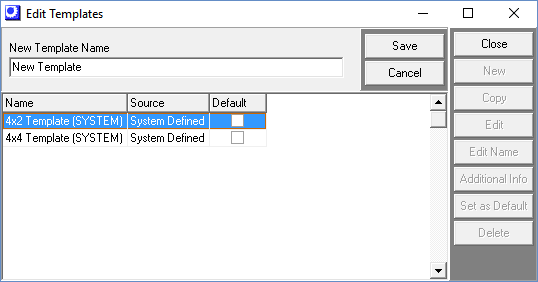
Screen Details
New Report Name
Give your template a name in this field.
Save Button
Click this button to save your new template.
Copy
Click this button to copy the selected template to a new template. A New Report Name field becomes visible at the top of the grid. Enter your new template name, then click the Save button. The page size specifications from the selected template are copied over to the new template.
Edit
Click this button to edit the page setup for this template. The forms edit screen is displayed. Click File – Page Setup to launch this screen, within which you can specify the printer, paper size, and other page setup settings.
NOTE: You cannot edit a template with a ‘system defined’ source, which is a standard template supplied with the system. Use the Copy feature to copy a system defined template to a new template if you wish to edit its page setup.
Edit Name
Click this button to change the name of one of your ‘user defined’ templates. A New Report Name field becomes visible at the top of the grid. Enter the new template name, then click the Save button.
Additional Info
This button is not relevant to templates and is grayed out.
Set as Default
Click this button to make the selected label version the default label version at time of printing.
