
(GL – Journal Entry)
Use this screen to make direct debit and credit transactions to the General Ledger.
NOTE: Transactions made via this screen are posted directly to the General Ledger and bypass the Batch Posting process.
Training Videos
 General Ledger Training Course
Segments: Journal Entry Purposes, Journal Entry, Recurring Journal, Journal Reversal, Payroll Journal Entry
Screen Details
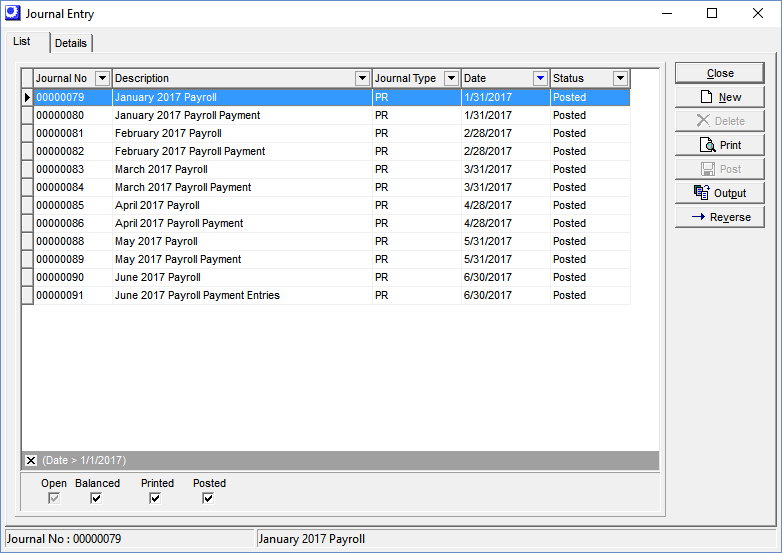
Grid Columns:
Journal No
This number is automatically assigned by the program when the Journal Entry is first created.
Description
Each Journal Entry is given a user-defined Description when it is first created.
Journal Type
‘GJ’ is a contraction for ‘General Journal’ and ‘PR’ is a contraction for ‘Payroll Journal’.
Date
This is the intended or actual posting date for all transactions associated with this Journal Entry.
Status
Four possible values are:
Open
The Journal Entry has been started, but is not in balance.
Balanced
The Journal Entry is in balance, but has not yet been printed or posted.
Printed
The Journal Entry is in balance and has been printed, but has not yet been posted.
Posted
The Journal Entry has been posted to the General Ledger.
Right Panel:
New Button
Click this button to start a new Journal Entry. You are presented with these two choices in a drop-down list:
General Journal Entry
Select this option for all Journal Entries that are not related to payroll.
Payroll Journal Entry
Select this option to manually enter payroll account summaries or detail transactions generated by your outside payroll system. Two additional entry fields are presented on the next screen: Chk No and Payee.
Payroll Import Option
As an alternative to manual entry, payroll account summaries or transaction detail can be imported into the Journal Entry screen via the Payroll Import screen. See the next chapter for details.
Delete Button
Click this button to delete a Journal Entry.
NOTE: You cannot delete a Journal Entry when it has a Status of ‘Posted’.
Print Button
Click this button to get a printout of the transaction detail associated with the selected Journal Entry.
NOTE: You cannot print the report when the Journal Entry has a Status of ‘Open’.
Post Button
Click this button to post the selected Journal Entry to the General Ledger.
NOTE: You cannot post the Journal Entry when it has a Status of ‘Open’.
Reverse Button
Click this button to reverse the selected Journal Entry. This creates a reversal Journal Entry with a Status of ‘Balanced’ that consists of debit and credit transactions that are exactly the opposite of the original Journal Entry. The reversal Journal Entry should be reviewed and then posted the same as any other Journal Entry.
Lower Panel:
Open, Balanced, Printed, Posted
Select these checkboxes to filter the contents of the grid by the Status value. The Open, Balanced, and Printed checkboxes are selected by default so that the list is initially limited to Journal Entries that are in process.
(GL – Journal Entry - Details Tab)

Screen Details
Journal Information:
Journal Date
This is the posting date that will ultimately be applied to all transactions associated with this Journal Entry. It defaults to today’s date, which can be overridden with a selection from the lookup.
Journal Type
This read-only field displays the Journal Type (‘General’ or ‘Payroll’) that was selected when the New button was clicked on the List tab.
Journal Status
This read-only field displays the current Status of this Journal Entry, which can be ‘Open’, ‘Balanced’, ‘Printed’, or ‘Posted’.
Journal Description (Required)
Enter a Description that identifies this Journal Entry on screens and reports.
Line Totals:
Debits
This field displays the sum of the Debit entries in the entry grid.
Credits
This field displays the sum of the Credit entries in the entry grid.
Difference
This field displays the difference between total Debits and total Credits.
Notes Side-Tab
Use this field to enter freeform header-level Notes against this Journal Entry. These Notes print on the General Journal Entries report that is generated by clicking the Print button.
Entry Grid:
Account
Enter a valid GL Account or select one from the lookup.
Description
The Account’s Description is displayed in this read-only field.
Debit, Credit
You can enter an amount either in the Debit field or Credit field, but not in both. An amount is inserted by default based on the Difference value above, but can be overridden.
Notes
Click the down arrow in this field to display a notepad for entry of freeform Notes against this transaction.
Chk No
This field is only visible when the Journal Type is ‘Payroll’. If you are entering payroll detail for a particular payment transaction against your payroll bank account, you have the option of entering the check number in this field for reference during Bank Reconciliation. If you are entering summarized account information, leave this field blank.
Payee
This field is only visible when the Journal Type is ‘Payroll’. If you are entering a payroll detail transaction associated with an employee or employer payment, you have the option of entering the payee’s name in this field for reference during Bank Reconciliation. If you are entering summarized account information, leave this field blank.
Right Panel:
Close Button
Click this button to close the Details tab and return to the List tab. Your entries are automatically saved.
New Line Button
Click this button to initiate a new line in the entry grid.
Cancel Button
Click this button to either cancel the Journal Entry itself (if no grid entries have yet been entered) or to cancel an incomplete entry in the grid.
Delete Button
Click this button to delete a line from the entry grid.
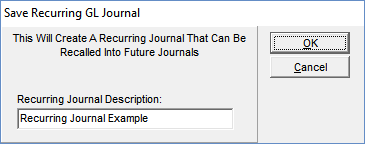
Save Journal Button
Click this button to save your grid entries so that they can be recalled for use in future Journal Entries without having to be reentered each time. You are presented with this screen where you enter a Recurring Journal Description that identifies this set of entries in the Recall Journal screen.
NOTE: You can also define and edit recurring journal entries in the GL > General Ledger Setup > Recurring Journal Entries screen.
Recall Journal Button
Recurring Journal entries can be defined and edited in the GL > General Ledger Setup > Recurring Journal Entries screen.
Click the Recall Journal button to populate the entry grid with a saved Journal Entry. You are presented with this selection screen:
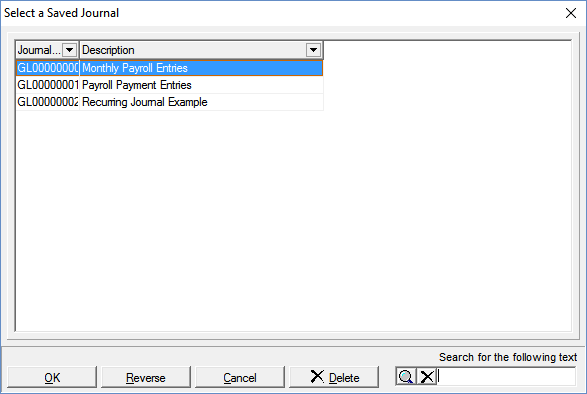
Buttons:
OK
Click this button to populate the entry grid with this saved Journal Entry.
Reverse
Click this button to populate the entry grid with a reversed version of this saved Journal Entry where the Debit and Credit amounts are reversed.
Cancel
Click this button to close the selection screen without any action being taken.
Delete
Click this button to permanently delete a saved Journal Entry from the selection list.
NOTE: To edit an existing Recurring Journal entry go to the GL > General Ledger Setup > Recurring Journal Entries screen.
