
(Purch – Purchase Orders - List Tab)
All or selected POs are listed on this screen, depending on the Status filters selected in the lower panel. You can highlight a PO and then click any of the tabs to the right to enter order details.
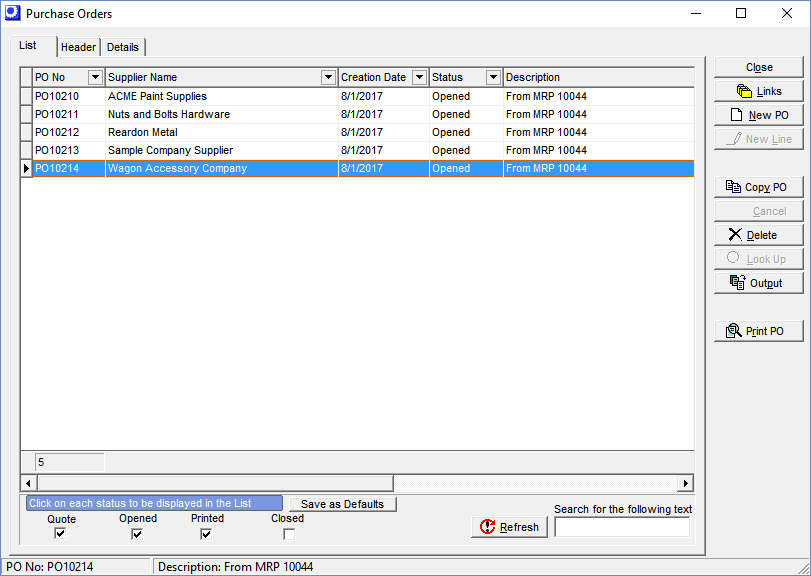
Screen Details
Lower Panel
Quote, Opened, Printed, Closed
Select or clear the checkboxes in this panel to filter the list above by PO Status. If Closed is selected, we default to purchase orders created in the past year.
Save as Defaults Button
Each user can preserve his or her Status checkbox settings by clicking this button. Each time the screen launches, these settings will be selected by default.
Refresh Button
Click this button after selecting or clearing any Status checkboxes or entering any search text to re-display the list above.
Search for the following text
You can enter text in this field and then click the Refresh button to limit the list to Description column values containing that text string. If the Closed status is selected, the text search will be performed on all Closed purchase orders.
Links Button
You can click this button to link to the following screens. After closing the linked screen, you are returned to this screen.
| • | PO Receipts |
| • | PO Invoices |
| • | Suppliers |
New PO Button
Click this button to create a new PO. You are presented with the PO Type Selection screen, which displays your default PO Type. You can select an alternate PO Type, if you wish. Click OK and the new PO is generated and you are taken to the Header screen.
NOTE: Manual PO generation should be on an exception basis only. All POs should normally be generated via the MRP workflow (See MRP Guide)
NOTE: If the Auto PO Number option is cleared in the PO Types screen for this PO Type, you are also presented with a PO Number field for manual entry of the number.
Copy PO Button
Use this button to copy the selected POs details to a new PO.
| • | You are first presented with a supplier selection screen. By default, the supplier on the original PO is selected, but you can make an alternate selection if you wish to purchase from a different supplier. |
| • | After selecting the supplier, you are presented with the PO Type Selection screen, which displays your default PO type. You can select an alternate PO type, if you wish. Click OK and the new PO is generated and you are taken to the Header tab. |
NOTE: When you copy a previous PO, prices and costs are updated with current values and pricing rules.
Print PO Button
Click this button to print or Email the printed PO for the highlighted PO.
Yes for Email, No for Preview
If the Email Documents checkbox is selected in the Contact Details sub-tab of the Header tab, you are presented with this prompt. If the checkbox is not selected, the PO is previewed on the screen and can be printed by clicking the printer icon.
| • | If you click Yes, you are presented with the standard Email client form, pre-filled with the Message Body Default Text for this user from the Main Setup screen. |
| • | If you click No, the PO is previewed on the screen and can be printed by clicking the printer icon. |
