
Multiple documents can be linked to stock items, descriptors, customers, and suppliers, and can be automatically linked to jobs and sales orders upon their creation or are available for retrieval after jobs and sales orders are initially created. Documents can be files stored on your Windows network or in the DBA database or web links.
Automatic Linking of Customer Documents to Sales Orders
If the Link to Job / SO checkbox is selected against a document linked to a customer, when a sales order for that customer is created, the document is automatically linked to the sales order.
Optional Retrieval for Sales Order Line Items
If the Link to Job / SO checkbox is selected against a document linked to a stock item or descriptor, when a sales order line is created, that document can optionally be retrieved and linked to the sales order.
Automatic Linking of Item, Descriptor, and Customer Documents to Jobs
If the Link to Job / SO checkbox is selected against a linked document, when a job is created, that document is automatically linked to the job if the document is linked to an item or descriptor that is an output or input to the job or the document is linked to a customer associated with a sales order linked to the job.
Where Are Documents Linked?
Documents are linked in the following screens:
| • | Stock Items – Documents Tab |
| • | Descriptors – Additional Tab |
| • | Customers – Additional Tab – Documents Side-Tab |
| • | Sales Orders – Header Tab – Additional Side-Tab |
| • | Jobs – Header Tab – Additional Side-Tab |
| • | Suppliers – Additional Tab – Documents Side-Tab |
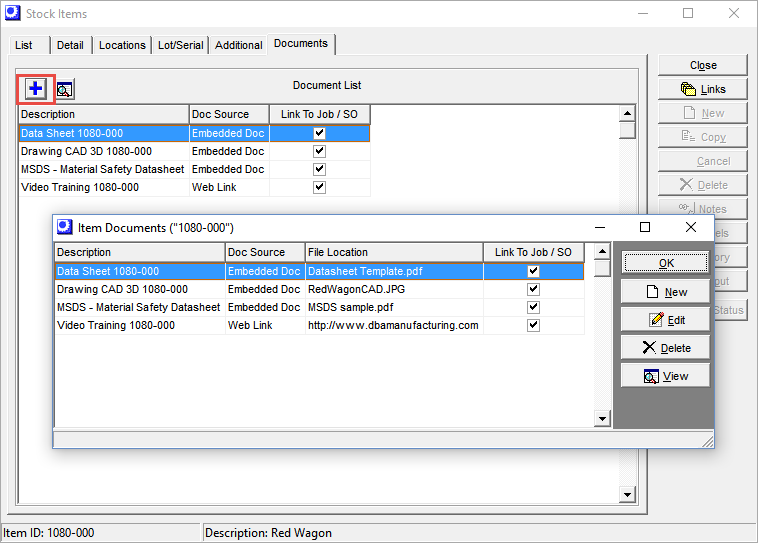
Linked Documents Grid
Wherever documents are linked, the same basic grid is used to add or edit documents. Screen details are as follows:
Buttons
+
Click this button to add or edit a linked document.
View
Click this button to view the linked document on the screen or to launch the web link.
Retrieve
This button is only visible within the Jobs and Sales Orders screens. For any line items after the job or sales order was initially created, you can click this button to automatically link any documents associated with those new line items. You can also select and link documents that were not flagged for automatic copying to jobs and sales orders.
Grid
Description
This description identifies the document in relation to the item, descriptor, customer, or supplier to which it is linked.
Doc Source
This identifies the source of the document, which can be ‘Doc Link’, ‘Web Link’, or ‘Embedded Doc’.
Link to Job / SO
This field is visible in the Stock Items, Descriptors, and Customers screens. This checkbox indicates that this document is to be automatically linked to jobs and sales orders upon their creation and be available for retrieval after jobs and sales order are initially created.
Doc From
This field is visible in the Jobs and Sales Orders screens. It indicates whether the document was retrieved from a stock item, descriptor, or customer.
Documents Screen
Grid
Description
This description identifies the document.
Doc Source
This identifies the source of the document, which can be ‘Doc Link’, ‘Web Link’, or ‘Embedded Doc’.
File Location
With a ‘Doc Link’ type, this is the location of the folder where the document is stored. With a ‘Web Link’, type, this is the web URL. With an embedded document, this is the file name of the stored document.
Link to Job / SO
This field is visible in the Stock Items, Descriptors, and Customers screens. This checkbox indicates that this document is to be automatically linked to jobs and sales orders upon their creation and be available for retrieval after jobs and sales order are initially created.
Buttons
Close
Click this button to close the screen.
New
Click this button to link a new document to this item, descriptor, customer, or supplier. You are presented with the new/edit documents screen.
Screen Details
Description
Enter the description that identifies this document on screens and lookups.
Copy to Job/SO
Select this checkbox if you wan the document to automatically be linked to any job (or sales order, for a customer document) within which this item is used as an input or output.
Select Button
Click this button to select the document type. You are presented with a screen containing these options:
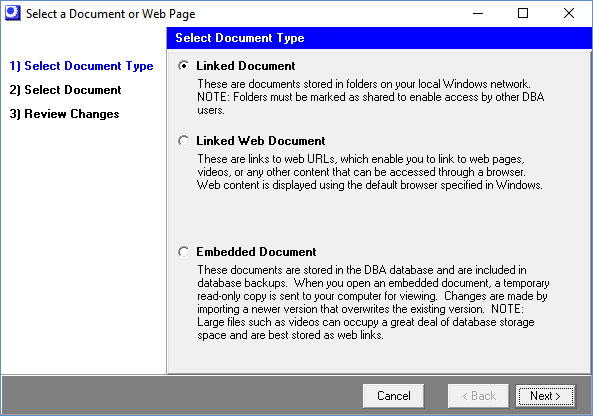
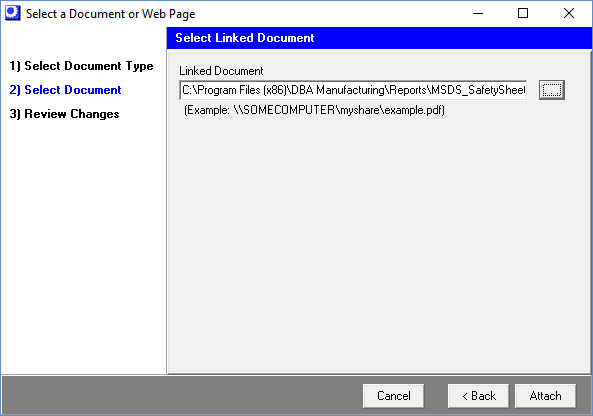
Linked Document
These are documents stored in folders on your local Windows network.
NOTE: Folders must be marked as shared to enable access by other DBA users.
After selecting this option, click the Next button. In the next screen, use the lookup to select your document, then click the Attach button.
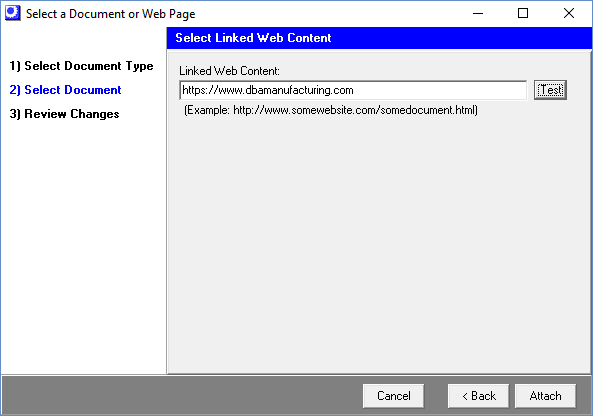
Linked Web Document
These are links to web URLs, which enable you to link to web pages, videos, or any other content that can be accessed through a browser. Web content is displayed using the default browser specified in Windows.
After selecting this option, click the Next button. In the next screen, enter the web URL. You can click the Test button to view the web content and verify the link. Click the Attach button.
Embedded Document
These documents are stored in the DBA database. When you open an embedded document, a temporary read-only copy is sent to your machine for viewing. Changes are made by importing a newer version that overwrites the existing version.
NOTE: Large files such as videos can occupy a great deal of database storage space and are best stored as web links.
After selecting this option, you are presented with the Select Embedded Document screen. All embedded documents linked to all members of this attachment type are displayed in the grid.
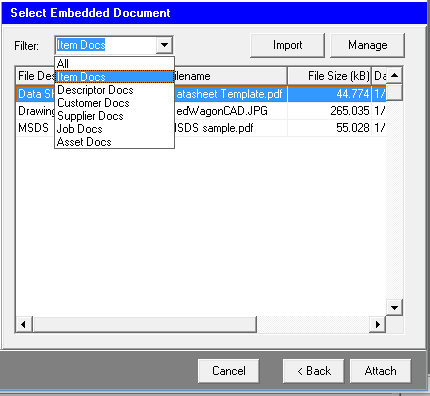
If you wish to attach an existing embedded document, select it and click the Attach button. If you wish to expand the list to documents linked to other attachment types, use the Filter in the upper panel.
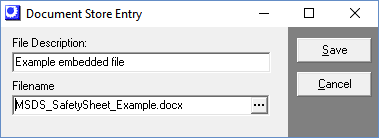
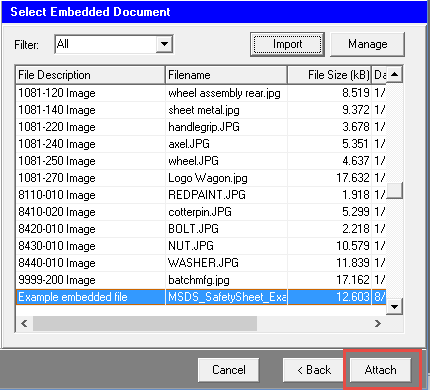
To embed a new document, click the Import button. Enter a File Description, which identifies this record within the database. Click the button in the Filename field to navigate to and select the file you wish to embed. Click the Save button. You are returned to the Select Embedded Document screen. Click the Attach button to attach the newly embedded document.
Manage Button
This button is available on the Select Embedded Document screen, which enables you to view a list of all documents embedded in the database. You can use the Filter in the upper panel to narrow the view to particular attachment types. While on this screen, you can use the New button to embed an unattached document for storage in the database. You can also use the Delete button to delete a document from the database.
Save
Click this button to save the new document and close the screen.
Cancel
Click this button to cancel your entries and close the screen.
Edit
Click this button to edit the document currently selected in the grid. You are presented with the new/edit documents screen, within which you can change the description, file location, web URL, or re-import a new version of an embedded document.
Delete
Click this button to delete the document currently selected in the grid.
View
Click this button to view the linked document or web content.
